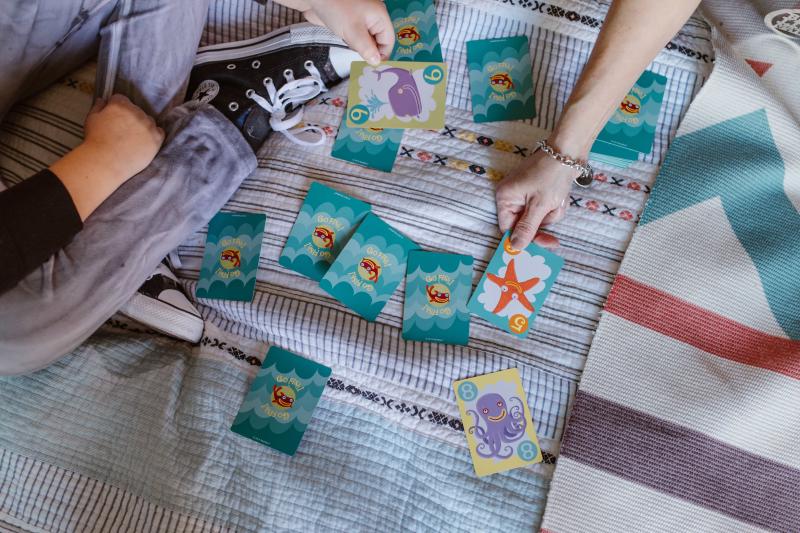
Some time ago I began a small side project to try to help me improve my front-end web development skills. Coming from a background of web services, APIs and integration, web development is something I really could do with improving. I didn’t want it to be a throwaway project, so I thought about making a small, simple game that my two boys might like to play, in the hope that the app saw some use.
The Game
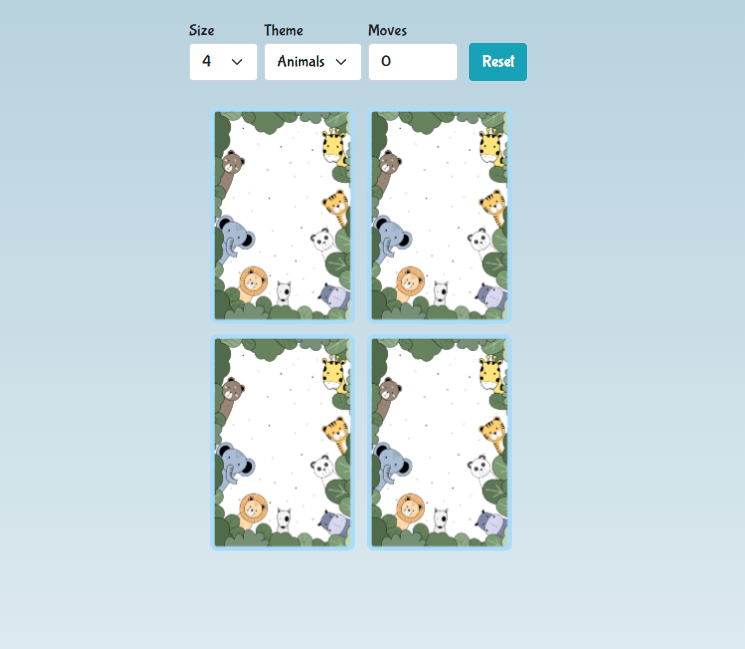
I decided to make a simple matching pairs game. In case you’re not familiar with it, a set of cards are placed face down and the player has to turn over two at a time with the aim of finding matching pairs. I like the game for several reasons.
- The rules are simple and intuitive, so it’s easy to pick up and play.
- The difficulty is easily altered through using more or fewer cards.
- New themes can be readily added to the game to add variety.
Coding
I wanted to avoid using any frameworks or libraries and code as much as I could from scratch. The bulk of the game consists of 3 files (HTML, JavaScript and CSS). There’s additionally, one JS file per “theme” to define the cards in the deck as well as the images for the artwork on the cards.
I readily admit that my CSS isn’t the strongest and so there’s a lot of code borrowed from samples on sites like StackOverflow and Codepen. Unfortunately, I’ve worked on this project off and on over a period of time and I’ve not kept references to my sources to give credit. To speed up styling the game controls, several styles have also been taken from Bootstrap.
The layout of the HTML is really quite simple. Theres a row across the top for the game controls to allow the player to select the board size and theme, as well as a counter for the number of “moves” (i.e. pairs turned over) and a button to reset the game.
Below that is the game board, which varies in size depending on what the player has selected.
The gameplay.js file is responsible for building the board based on the size and theme set by the player. It is also responsible for handling the onclick event when the player clicks on a card. A CSS class gets applied to animate the card rotation and a check is made to determine whether the pair match before rotating them face down if they don’t match.
It’s still a little bit rough around the edges and there’s a few tweaks I’d like to make in future, if I can find the time, but it’s in a good enough state to be playable right now.
Hosting
Continuing the theme of exploring Azure services, that’s where this project is hosted. As I mentioned in earlier posts, I used Azure Static Web Apps for hosting this blog, so this time I looked at hosting the game using the Static Website feature of Azure Storage.
Blob Storage Static Website
Getting a static website hosted in Azure is incredibly easy and straight forward to setup. Assuming you already have a storage account, find the Static website setting under Data management and then select Enabled.
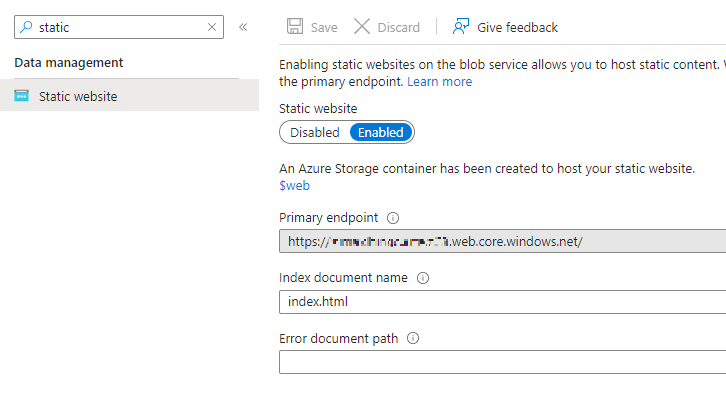
This will create a container called $web which will hold the resources for the website.
Provide the location to your site’s index location and then click Save.
Once all of the files have been uploaded to the $web container we can reach the game at the endpoint that was automatically generated for us.
Custom domain
The auto-generated domains are good to get going, but I really wanted to use a custom domain. Specifically, I wanted to run the game off a subdomain of adamrice.dev. Looking down the list of menu items for the storage account I spot the Networking menu item, click through and see a tab for Custom domain.
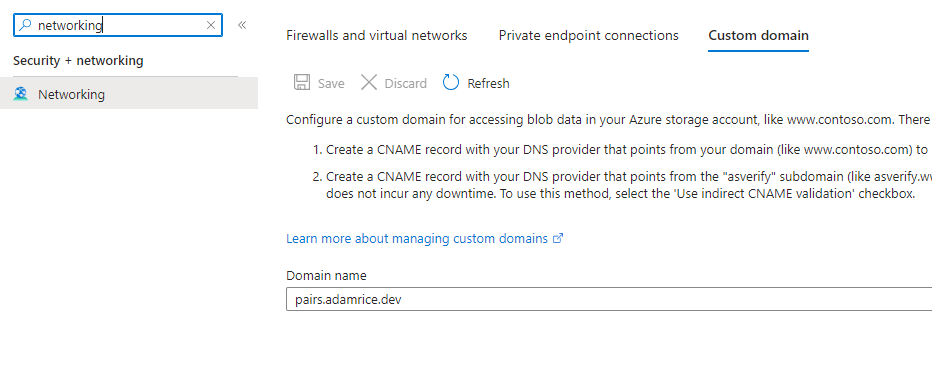
Having had some experience setting up DNS records when hosting this blog, I guessed it would be quite similar. Define a CNAME record, pairs.adamrice.dev pointing to the URL of the site and we’d be done. But it wasn’t to be.
After defining and double, then triple checking the CNAME record setup, it just wasn’t working. At this point I decide to RTFM.
It was on the page Mapping a custom domain to a static website URL that I found this little gotcha.
It’s easier to enable HTTP access for your custom domain, because Azure Storage natively supports it. To enable HTTPS, you’ll have to use Azure CDN because Azure Storage doesn’t yet natively support HTTPS with custom domains. see Map a custom domain to an Azure Blob Storage endpoint for step-by-step guidance.
Sad times. It’s annoying that it wasn’t as straightforward as it could have been, but now I have a good opportunity to get to play with Azure CDN.
Azure CDN
If you’re not familiar with it, Azure CDN is a content delivery network (CDN) which is a network of servers with locations around the world (Point-of-presence) that cache content so that it can be efficiently served up to users. By caching content in this way, it is closer to users so latency is reduced. Azure CDN has from Microsoft has 192 POPs across 109 cities around the world.
The first thing I need to do is Integrate a static website with Azure CDN. This process creates two new resources in my resource group - a CDN profile and a CDN endpoint.
The CDN profile is a container for the CDN endpoint resources and is used for setting the pricing tier and also organising endpoints.
Azure CDN can be enabled from within the storage account. Going to the Azure CDN menu item we can create the profile and endpoint.
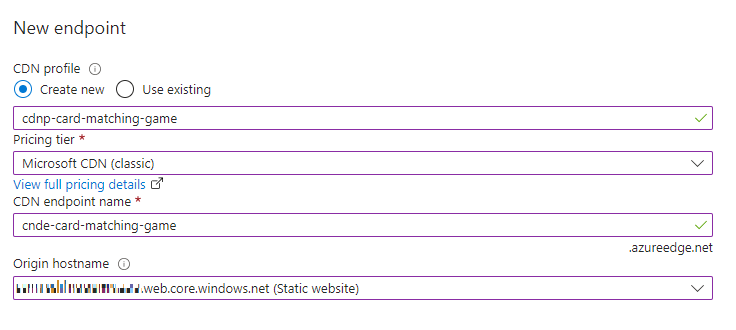
I selected the Microsoft CDN (classic) pricing tier. There are also CDN networks provided by partners, Akamai (now discontinued) and Verizon that offer different sets of features and pricing structure. To learn more see What are the comparisons between Azure CDN product features?
The last part of the configuration is to ensure that the Origin hostname is set to the static website.
Once the CDN endpoint has been created the static website should be reachable through the Endpoint hostname URL.
Now it’s time to get back to setting up the custom domain.
Custom Domain (part II)
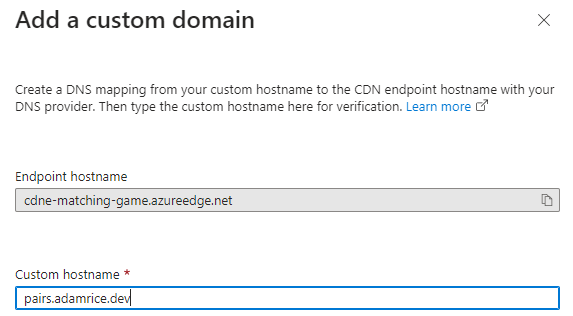
There’s a great tutorial that documents in detail exactly how to Add a custom domain to your endpoint.
At a high level the process consists of:
- Mapping a temporary cdnverify CNAME record.
- Mapping the permanant CNAME (pairs.adamrice.dev) to the CDN endpoint hostname.
- Adding the custom domain to the CDN endpoint resource in the Azure portal.
The DNS records have been defined as follows through my DNS provider’s site:

Back in the Azure portal, on the CDN endpoint page, click the + Custom Domain button to add the custom domain to the CDN endpoint.
Enabling TLS/SSL
The last thing to do is to Configure HTTPS on an Azure CDN custom domain. Since I don’t want to be managing TLS/SSL certificates myself, I’ll be using one managed by Azure.
To start the process off we need to select the custom domain that has been added to the CDN endpoint.
Once selected, we just turn on Custom domain HTTPS and make sure CDN managed is selected for the certificate management type.
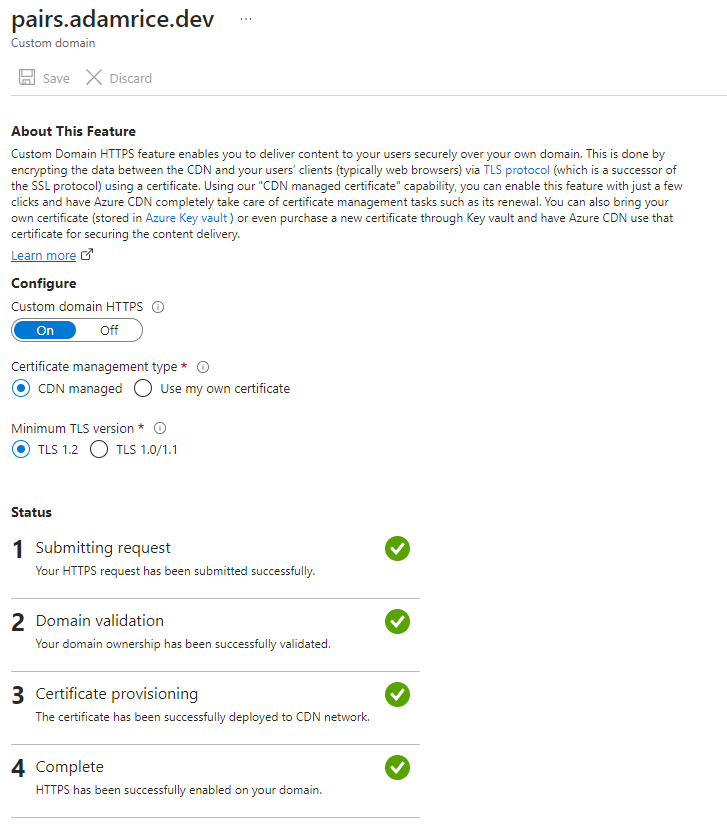
Because we defined a custom domain mapped to the CDN endpoint earlier on, as long as that CNAME continues to exist, Azure can use that to automatically verify I own the domain. It will then provision the certifcate and the website will be live over HTTPS. The automatic validation can take a few hours. Microsoft recommend opening a support ticket if your domain hasn’t been validated in 24 hours.
What a journey
The deployment has been a bit of a journey and definitely not as easy as it could have been but we’ve got a static website hosted with a custom domain name, served over HTTPS with a managed TLS/SSL certificate, and distributed around the world through a CDN. That’s a pretty good result I think. Now, time to play. Or if you want to have a look at the code, head on over to GitHub.