
At the moment we’ve got a basic todo list application that has a certain look-and-feel but there’s aspects of the underlying Azure services showing through. Lets take a look at what they are and what we can do about them to make the whole thing look and feel more cohesive.
What do we need to brand?
There are a few things that we need to fix to “hide” the fact that it’s Azure powering the application. Firstly, our static web app needs a custom domain to get it off the default domain provided by static webapps and secondly, there are few things related to Azure AD B2C that need branding:
- The styling of the UI presented to the use in a user flow.
- The URL that the user is redirected to when executing a user flow.
- The email validation emails the user receives during sign up.
Azure Static Web Apps Custom Domain
When you setup a static web app, Azure will provide it with a default hostname. Our app here is currently hosted at nice-wave-049615103.3.azurestaticapps.net. Not pretty, but it gets the job done. Setting up a custom domain for a static web app is something I’m familiar with as we’ve been here before when setting up a custom domain for this blog. As we’ve done it before I won’t rehash the process here so follow the link to my previous post on the topic for more details.
I chose to host the sample app on a subdomain of my personal domain - howdo.adamrice.dev - just to minimise costs for this project and to keep things simple.
Azure AD B2C
Now let’s take a look at the components of Azure AD B2C that we need to brand and how we go about it.
User Flow Styling
The UI presented to the users when they’re executing a user flow (sign up, sign in, profile editing etc.) is based on one of the three out-of-the-box templates provided by Microsoft. As they’re stock templates it’s painfully obvious to the user that these pages are not part of the rest of the app as they look so different. It would be nice to make these pages look like they’re part of the app to help present a seamless transition between the app and Azure AD B2C user flows, improving the experience for the user.
Microsoft provides two different options for customising the UI:
- Company branding
- Custom HTML templates
These two options are radically different from each other both in terms of the effort required to set up, but also in the level of customisation they support.
Company Branding
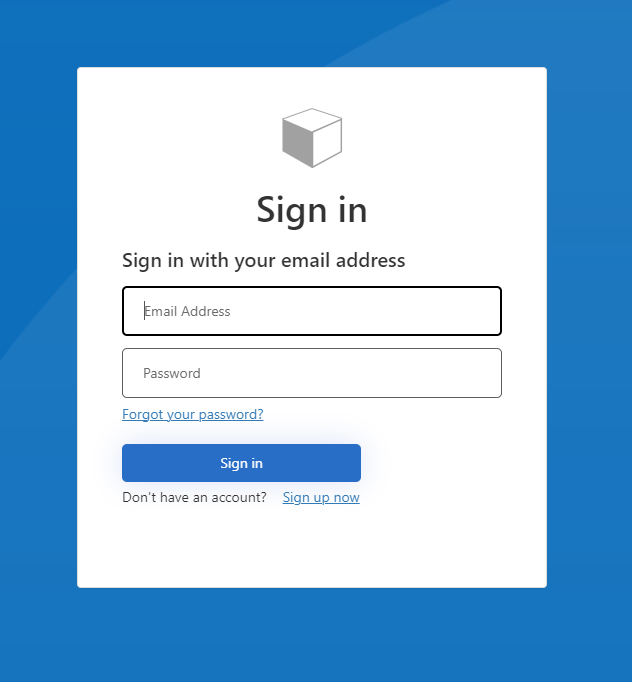
The company branding option is really quite limited with what it allows you to do. With this feature all we can do is change the banner logo and the background image. So we can go from this default experience:
To something not massively different:
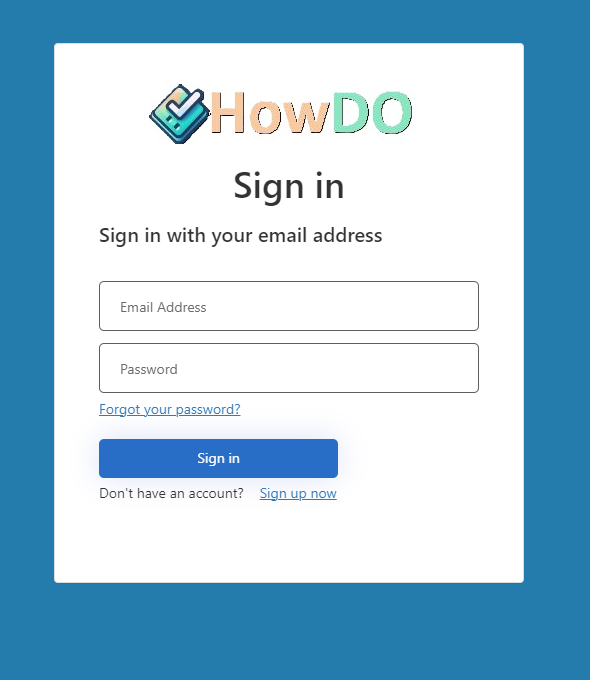
All we’ve managed to do is change the background colour and the logo. I think we can do better than this.
Custom HTML Template
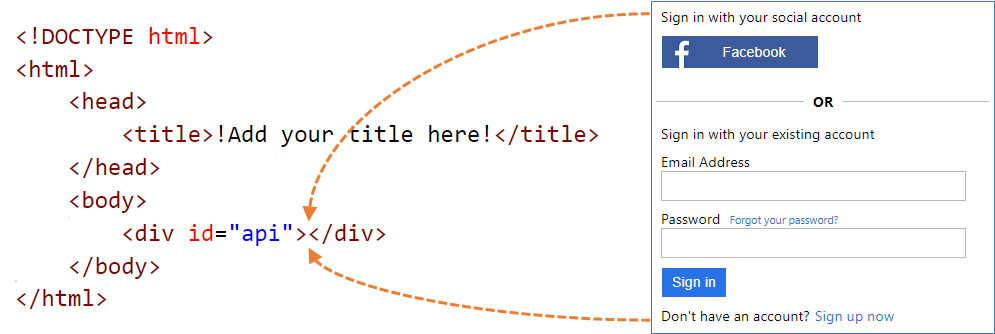
The other, more involved, but more powerful option is to provide custom HTML templates. With these templates we have almost full control over the HTML. At a high level, we need to develop a page that has a div element with its id attribute set to api. When the page is served up to a user, Azure AD B2C merges in an HTML fragment (the form content) at that location. All we need to do is make the page available somewhere and tell Azure AD B2C where to find it.
Microsoft provide the templates for each of the 3 themes and recommend that you build customisations on top of the default content. There are several things to take into consideration when building a custom template. These guidelines are well worth reading before beginning work to avoid wasting time by going down a route that’s not supported. If you’re looking at using JavaScript there’s a separate set of guidelines that are also worth reading too. As I was using Vue & Vuetify in the application I began by attempting to use them here, but found I had wasted time once I found and read these guidelines.
In order to begin developing and testing locally, I copied the templates from the GitHub repo and then manually merged in the HTML fragment to the “api” div to give me something to work with. I’ll replace this with an empty div before uploading the custom template.
Personally, I don’t mind the layout of the screens, I’d just prefer them to have a consistent look and feel with the rest of the application. So I left all the original CSS in place and just made the necessary customisations where they were needed. These consisted mostly of changing the colour of various elements and changing their appearance slightly.
Vuetify generates a CSS rule that declares several variables for the colours that make up colour scheme of the theme. To make styling the templates a bit easier I copied this into the template. This means that wherever I want to use a particular colour I can just reference the variable.
Below is an example of the changes I made to style the buttons. The full page is too long to include here, but I’ll make the repo available later. As I’d copied in the CSS variable declarations from the app I was able to make reference to them here, meaning that if I change the colour scheme in future, updating it in these templates will be quick and easy.
|
|
One other customisation I had to add was some JavaScript to set the tab order on the form elements. There was a rather annoying issue where tabbing from the Email Address input moved focus to the “Forgot your password?” link rather than the Password input. The JavaScript I added fixed this to improve the user experience here.
|
|
After making the tweaks to the sample template we’ve now got something that looks like this.

It’s not perfect, it could benefit from a bit more time being spent to make it a closer match to the Vuetify styles, but it’s close enough for now to illustrate the level of control we have over the template.
Custom URL
The second aspect of Azure AD B2C that we need to customise is the domain that the user gets redirected to. By default, when the user invokes a sign up/sign in flow they’re redirected to the b2clogin.com domain. For example:
|
|
Where ‘contoso’ would be the name of your Azure AD B2C tenant. It would be preferable if we could remain on the same domain and have the user redirected to something like:
|
|
The process of setting up a custom domain is well documented, although you need to pay particular attention to step 1 and ensure the domain is added to the right Microsoft Entra ID service. Briefly, the steps are as follows:
- Add the domain to Microsoft Entra ID (formerly Azure AD) in your Azure AD B2C tenant and verify it with a TXT record.
- Create an instance of Azure Front Door.
- Set up your custom domain on Azure Front Door.
- Reconfigure CORS settings on the storage account hosting the HTML templates to allow access from our custom domain.
- For complete removal of Microsoft references we can replace the tenant name with the tenant id in the URL.
After following that process, the resulting URL the user sees when they’re redirected looks something like this:
|
|
While the process itself is quite straightforward, the implementation is rather disappointing. The requirement of Azure Front Door adds a cost of around £27/mth to the solution, but we get limited value from it (a vanity URL for logging in). And there’s no way around this. It seems that Azure Front Door and Azure AD B2C are doing some things in the background to make this work. One answer I found online suggests that the Azure AD B2C servers only trust the required X-Forwarded-Host header on requests coming from Microsoft’s own CDN.
After having had the experience of configuring a custom domain in Azure Static Web Apps, which was all handled within the service with no dependencies on other Azure services, it’s frustrating that Azure AD B2C doesn’t handle it in a similar way.
Having just deployed Azure Front Door, this leads me onto the Enterprise-grade Edge feature of Static Web Apps. Enabling this feature deploys a managed version of Azure Front Door that provides our application with all the benefits of Azure Front Door, but at a significantly reduced cost, of around £14/mth. Having just deployed an instance of Azure Front Door, it renders this feature somewhat redundant, as I would now use the instance I’ve got and configure it manually for the app, rather than incurring further costs for Enterprise-grade Edge.
This then brings another issue in that if you’ve manually deployed Azure Front Door in front of a static web app, you no longer manage the custom domain through Azure Static Web Apps, but now via Azure Front Door. This is not a problem if you’ve used Enterprise-grade Edge.
If Static Web Apps can deploy a managed version of Azure Front Door “under the covers” to deliver the Enterprise-grade Edge capability, perhaps one day Azure AD B2C might go down that same route and deploy a managed instance purely to handle the customising of domain names. We can but hope.
Email Validation Emails
When a user invokes the sign up or password reset user flow, they’re prompted to validate their email address. This involves an email being sent to them containing a code (a one-time password, or OTP) that they then type into the form.
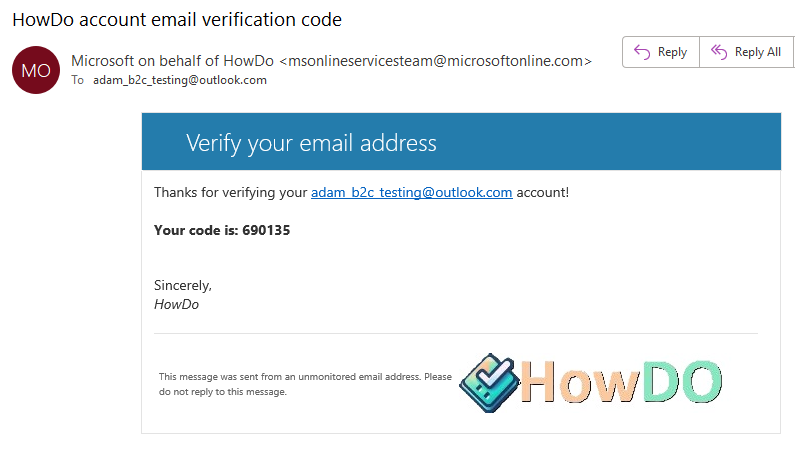
The default email looks like this:

We have some control over its appearance through the Company Branding feature of our Azure AD B2C tenant. If we configure that, it will have some effect on the email. For example, if we provide a logo, that will be included in the footer of the email.
But what we can do is really quite limited. The default email is ok, it’s functional and does the job, but there’s a couple of things we can improve:
- Change the styling to make it more “on brand” with our application.
- Change the From address to have the email come from our own domain rather than a Microsoft domain.
Unfortunately, in order to do this we need to move away from User Flows and start looking at Custom Policies, which makes the solution quite a bit more complex. In addition, we’re also going to need a third-party email provider like SendGrid, Mailjet, or SparkPost. This experience feels like something of a feature gap in Azure AD B2C. The way it supported the customisation of the user flows UI through custom HTML templates was really nice - define some HTML and CSS, host it somewhere and voilà - you’ve got a a customised UI. It would be much nicer if the process for customising the email was delivered in the same way, and contained within Azure, rather than relying on a third-party service.
However, we can only work with what we’re given, so onwards and upwards. With these 3 suggested services (SendGrid, MailJet, and SparkPost) I began looking at each of the providers to do a quick comparison to see which would be most suitable. Unfortunately, I found SparkPost’s pricing page to be confusing and despite advertising a free tier, it wasn’t clear what its limitations were so I quickly ruled that out. SendGrid and MailJet were a lot clearer on what their free tiers offered. SendGrid allow sending up to 100 emails per day, with the next tier up costing $19.95/mth. MailJet’s free tier allows the sending of 200 emails per day (6000/mth) and the next plan up costs $15/mth. This will support 15,000 emails per month. That plan also removes the MailJet logo from the footer of the email. If we’re going for a fully branded solution that’ll be a must.
As MailJet’s free tier was more generous, and their first paid tier was cheaper than SendGrid, I opted to use MailJet for this. Microsoft provide instructions specific to MailJet, which I followed to get this working.
- Create a MailJet account.
- Setup and validate a sender email address or domain.
- Create an API key and secret.
- Use the HTML provided to create an email template in MailJet. This contains a couple of variables (for the code and the user’s email address) that will be substituted.
- In Azure, store the API key & secret created in step 3 in Azure AD B2C.
- Make several amendments to the custom policy files.
It was all rather straightforward until step 6. Having only used user flows to this point, custom policies were completely new to me. It was at this point I took a step back and simply tried to replace the existing user flows with custom policies to support the same user journeys we had so far.
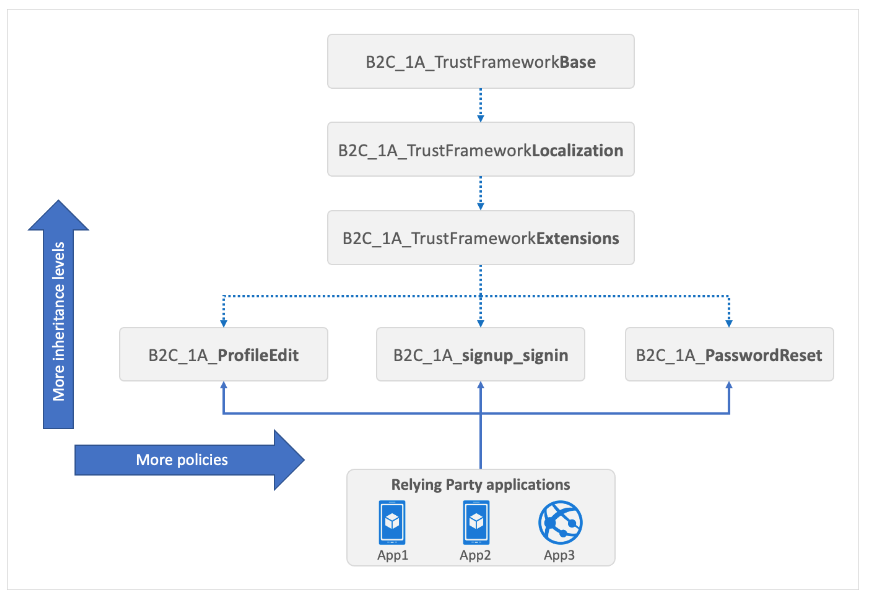
I began by reading the custom policy overview page of the documentation and found this diagram particularly useful in explaining the inheritance model and how these XML documents relate to one another.
Microsoft also very helpfully provide a starter pack of custom policy files. To keep it simple I took a copy of the policy files in the LocalAccounts folder, as I didn’t want the additional complexity of Social accounts right now. Armed with these templates I then followed the tutorial for creating custom policies. Briefly, the process looks like this:
- Register two applications - IdentityExperienceFramework and ProxyIdentityExperienceFramework - in your Azure AD B2C tenant.
- Add the application IDs to the custom policy.
- Update the tenant in all of the policy files- replacing
yourtenantwith the actual name of your tenant. - Upload the policy files to Azure AD B2C in a very specific order.
- Test the custom policy.
At this point it was working and I could run the sign up/sign in custom policy and it would sign me up, complete with validation email. We’ve successfully replaced the user flows with custom policies. Well, almost. The starter pack is making reference to the original HTML files for the UI, using the lovely Ocean Blue theme we’d spent so long trying to customise. So we need to make a small change to the TrustFrameworkExtensions.xml file. The TrustFrameworkBase.xml contains several ContentDefinition blocks, one for each of the different flows. We need to copy them all and paste them into the same place in the TrustFrameworkExtensions.xml file, but modifying the LoadUri tag.
|
|
In the original, the LoadURI element referenced ~/tenant/templates/AzureBlue/<filename>.cshtml but now we’re referencing out custom HTML we hosted in Blob storage earlier. Note, I’ve not fully customised all of the required pages, for instance, I’ve not produced a custom error page. In the example XML above the default error page is still being used.
After that slight detour we’re back to where we started, except we’ve replaced the user flows with custom policies, complete with custom HTML. Now we can go back to the instructions for configuring MailJet. This time around, having had some experience with custom policies, what’s needed is much clearer. The instructions provide each fragment of XML that’s needed and details on where to paste it in. Whilst the accompanying explanation of what the XML was for was helpful for understanding, it was a difficult process to follow. I found it much easier to grab the sample custom email verification policy files from GitHub and begin with those. Using these, all that was required were a few small changes:
- Replacing
yourtenantwith the actual name of the Azure AD B2C tenant. - Adding the sender address and the MailJet template ID to DisplayControl_TrustFrameworkExtensions.xml and change the subject line.
- Additionally, I added the
LoadURIelement to theContentDefinitionelements to specify my custom HTML to be used for the UI.
Once the changes were made I uploaded the policy files and was able to test it. This is what the result email from MailJet looked like:
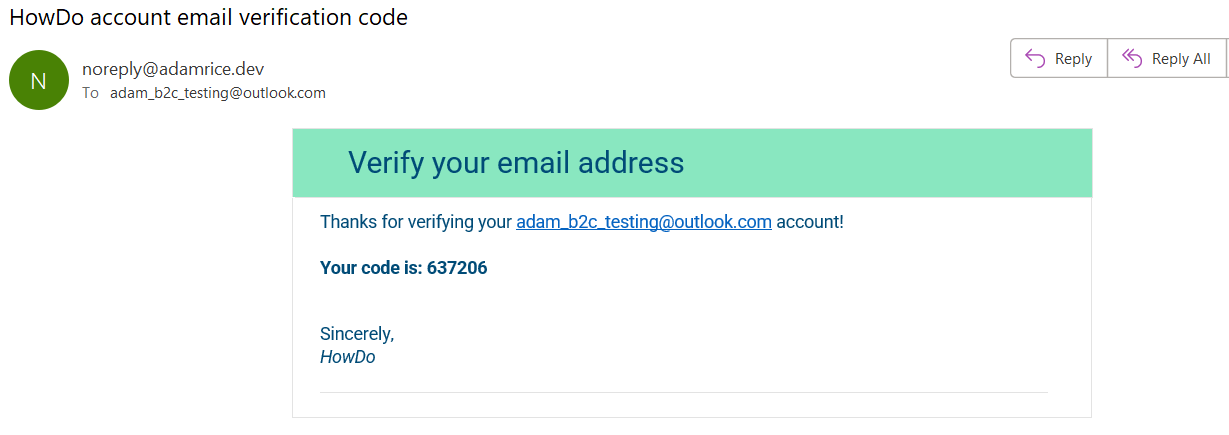
The colours and font of the email now look like they belong to the HowDo application and the sender address is coming from my domain, rather than a Microsoft domain. Although the changes to the email I’ve made are minimal right now, with this implementation we do have full control over the appearance of the email and with more time I might develop that further.
Complete Azure Solution
One thing I mentioned earlier that I disliked about this solution for customising the emails is the reliance on a third-party email provider. A note in the Microsoft documentation said that, apart from the third parties listed, a custom REST API, or any HTTP-based email provider (including your own) would also work. So I started looking to see if there was a way to do this entirely in Azure, and that’s when I discovered Azure Communication Services. Azure Communication Services offers a variety of APIs across different forms of communication such as voice, video, chat, text messaging/SMS (and WhatsApp), and most importantly for our use case, email.
The MailJet Essentials plan costs $15/mth for 15,000 emails, so I plugged the same figures into the Pricing calculator to see what it would cost using Azure Communication Services.
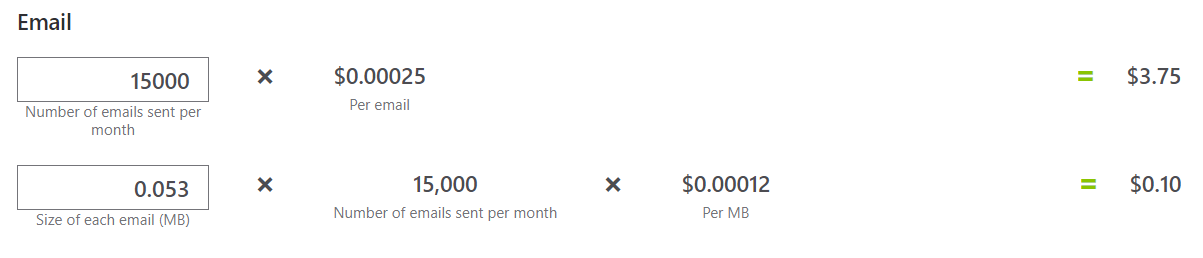
$3.85 to send 15,000 emails. That’s quite a substantial saving! Admittedly, MailJet provides a whole host of features that we won’t get if we replace it with a simple API and Azure Communication Services, but for transactional emails, I think we can get away without them.
Let’s take look at the process for replacing our dependency on MailJet with Azure Communication Services. The current process for generating and sending an OTP is:
- Azure AD B2C generates a JSON payload containing, among other things, the recipient’s email address and an OTP.
- Azure AD B2C sends that JSON payload to the MailJet API.
- MailJet replaces tokens in the template we’d previously uploaded with elements of that JSON payload, then sends an email.
To replace this we’re going to need:
- Somewhere to upload the email template to - Blob storage.
- An API to receive the JSON payload - Function App.
- A service to send the email - Azure Communication Services.
The first step is going to be getting an instance of Azure Communication Service created.
-
Create the Azure Communication Services resource.
-
Add a custom domain and validate using a TXT record. Once it’s verified you can add your SPF and DKIM records to authenticate your domains.

-
Once the domain is fully verified it, connect the domain with Azure Communication Services.
-
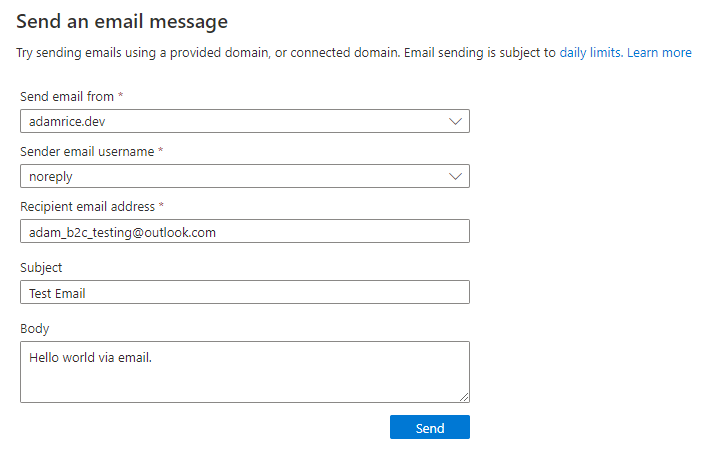
Send a test email from the Azure Portal.
Now we’ve got that all working we can move onto creating the Function App and the Storage Account. As the Function App requires a Storage Account I just uploaded the email template to a container there for ease. This is the code used in the function app to receive the JSON from Azure AD B2C, extract the OTP and recipient’s email address, merge into the template and send an email.
|
|
To get Azure AD B2C to start making use of this, there are a few changes we need to make to our custom policies. Firstly, in DisplayControl_TrustFrameworkExtensions.xml we need to update the ServiceUrl and the AuthenticationType. The values for MailJet were this:
|
|
And we need to update them to this:
|
|
Obviously the API is at a different location, but also the authentication mechanism has changed. The MailJet API was using Basic Auth, but our function app will receive the API key in a header.
We then need to change the Cryptographic keys changed from requiring a username and password:
|
|
to this, which just requires the API key:
|
|
We also need to add the Function API key as a Policy key into our Azure AD B2C tenant, called B2C_1A_EmailApiKey.
With all that in place we can run the custom policy B2C_1A_DISPLAYCONTROL_SIGNUP_SIGNIN and check that we get an email. It should look exactly as it did earlier when sent from MailJet.
Conclusion
In this post we’ve done a lot! We started by giving our application a custom domain and moving off the default one provided by static web apps. Then we moved on to developing some custom HTML to make the sign up/sign in process look and feel like the rest of the app. Next, we gave our Azure AD B2C tenant a custom domain, which involved getting an instance of Azure Front Door involved. And finally, trying to customise the verification emails we went on quite a journey into custom policies, third-party email providers, and the discovery of Azure Communication Services.
I would like to keep this app running as a demo, however I can’t justify the additional cost Azure Front Door adds for a simple demo. With that I’ll remove it, so if you do take a look at HowDo and sign up/sign in you’ll be redirected to the b2clogin.com domain. If you want to take a look at the code it’s all available on GitHub at https://github.com/arice2358/sample-app.